Our Process
Our Process
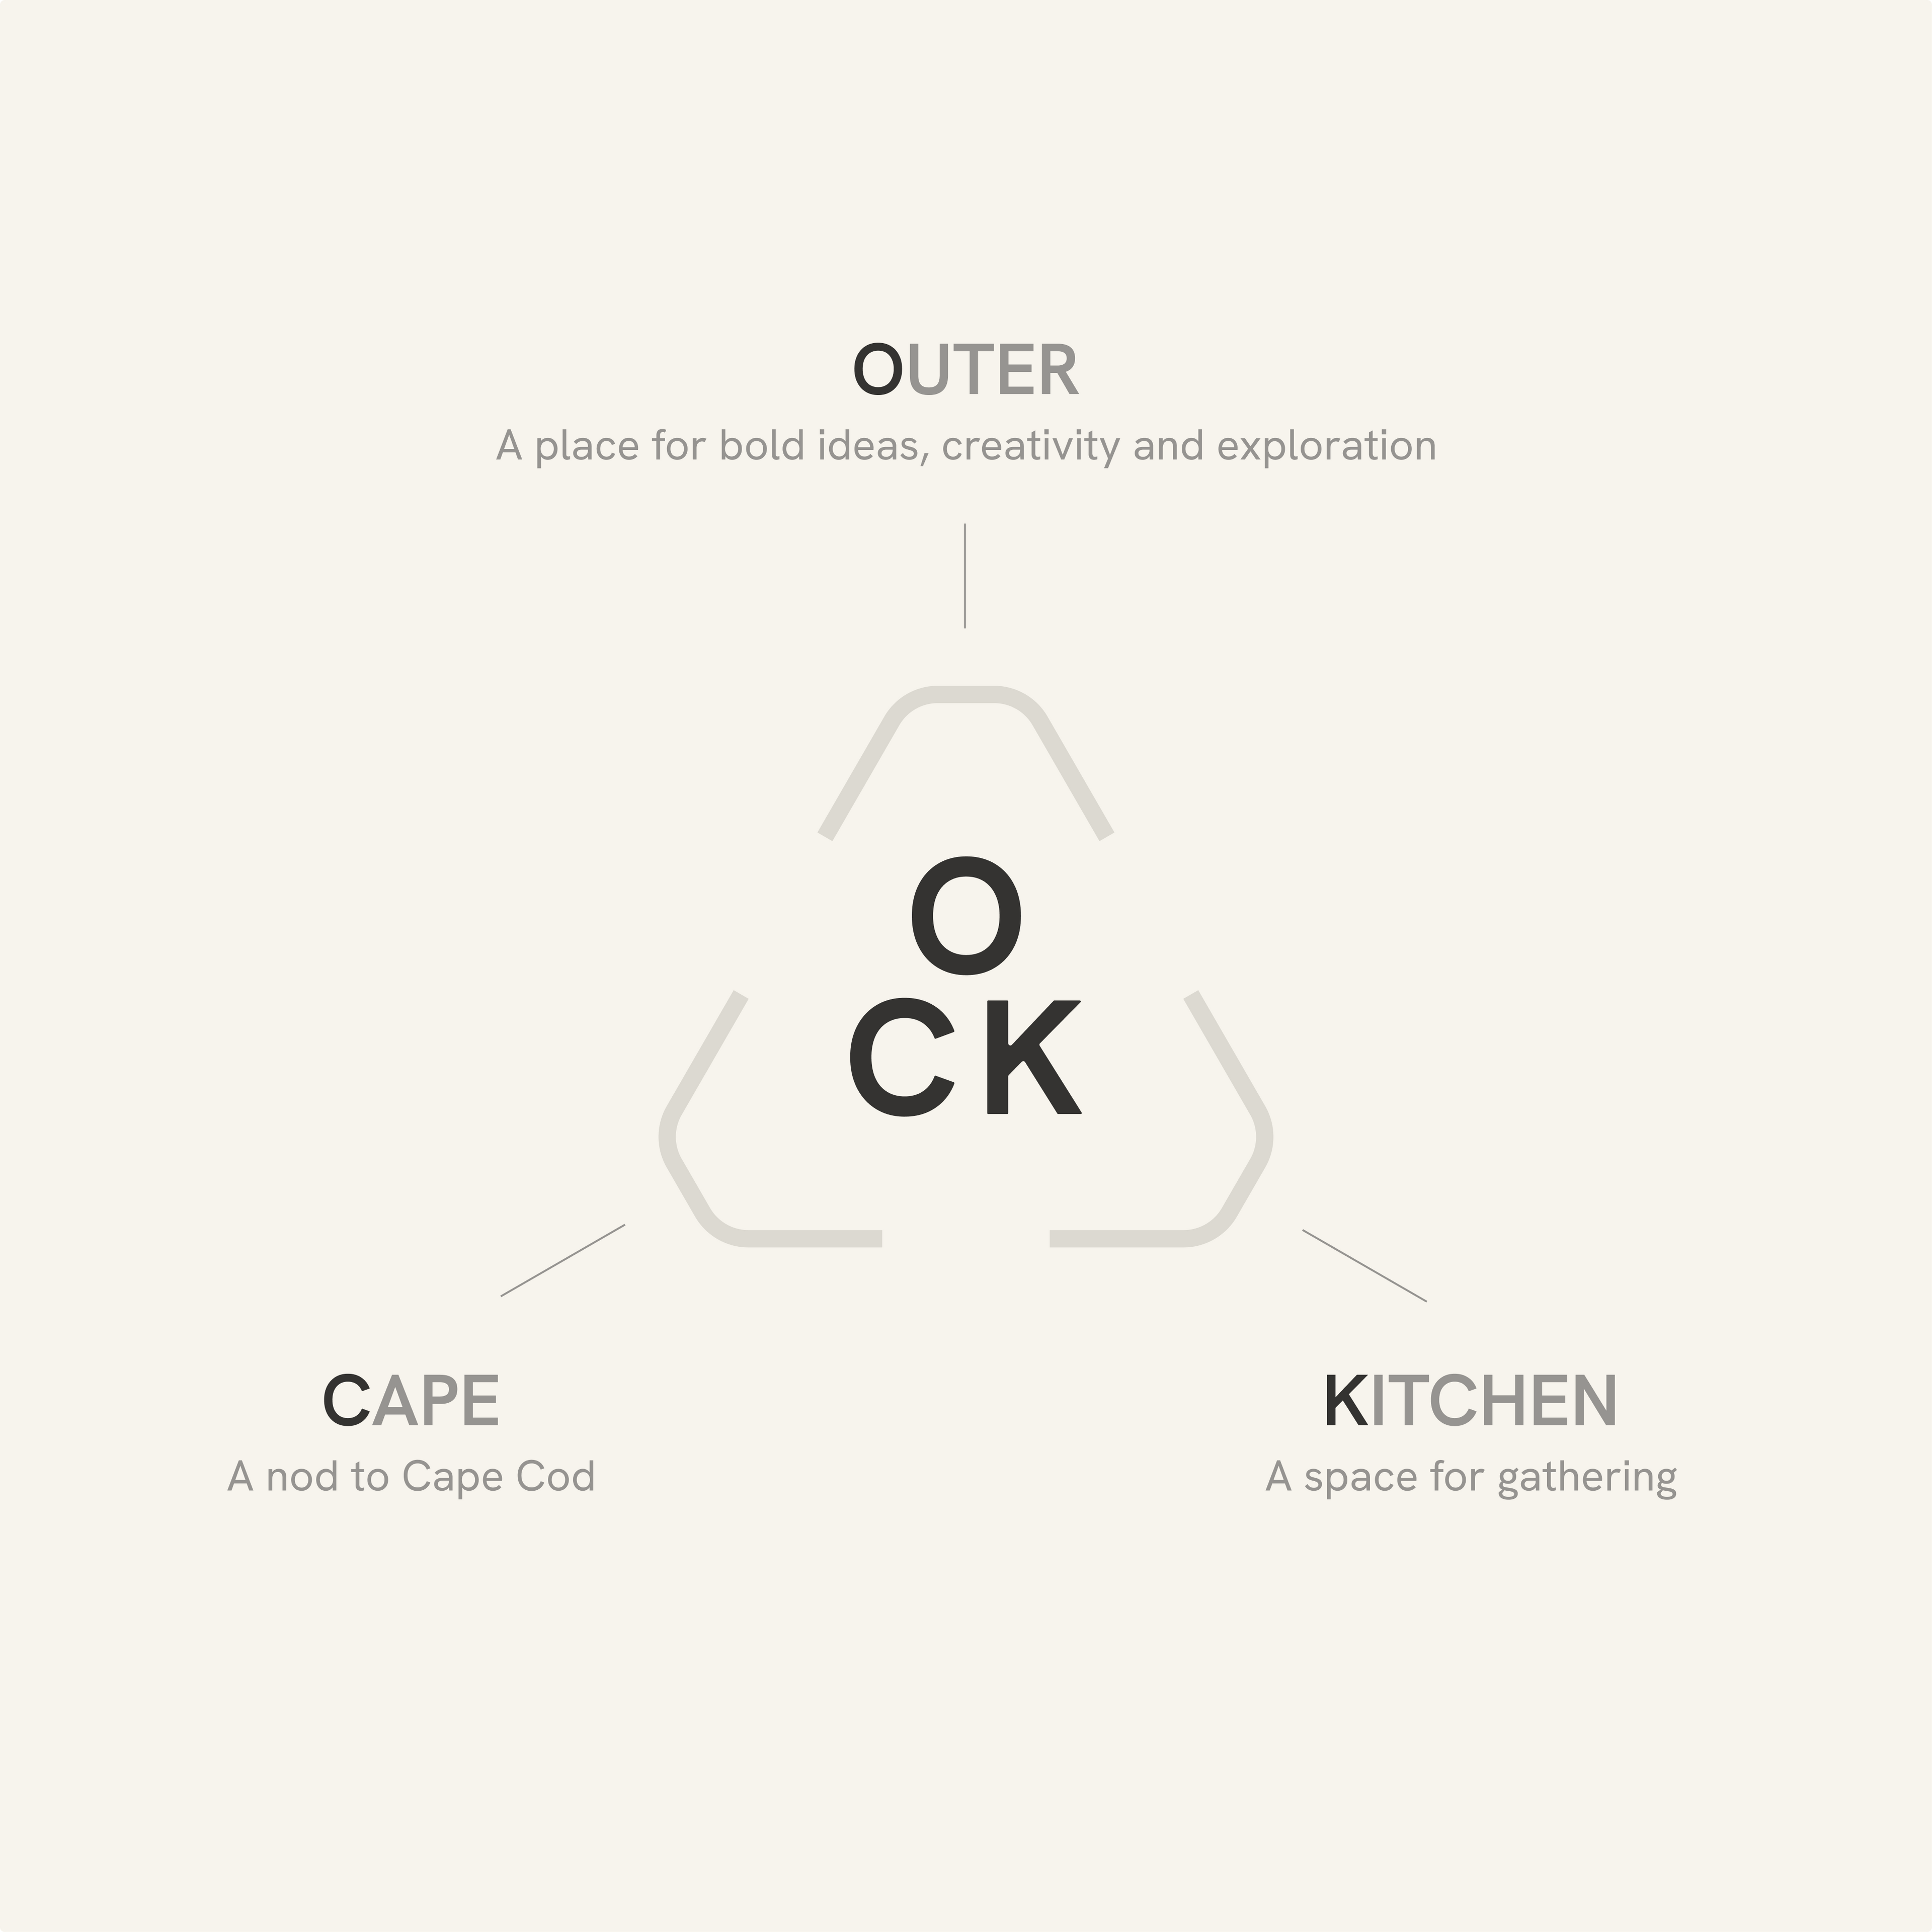
From oyster farms in Wellfleet to windswept days on the Outer Cape, every OCK tool starts with the real world. Our process blends salty experience with sharp design, shaped by ocean grit, refined through sketches, and tested by hand. This isn’t just about making oyster knives, it’s about rethinking the tools we use to enjoy seafood on the coast.

Our Process
Why Shucking Oysters Is Hard
From oyster farms to raw bars, we’ve spent time on both sides of the shell. And here’s the truth: shucking is hard. It takes strength, technique, and patience. That’s why we set out to design a better oyster knife, one that makes shucking safer, more intuitive, and just a little more enjoyable.
Fixing Oyster Shucking Ergonomics
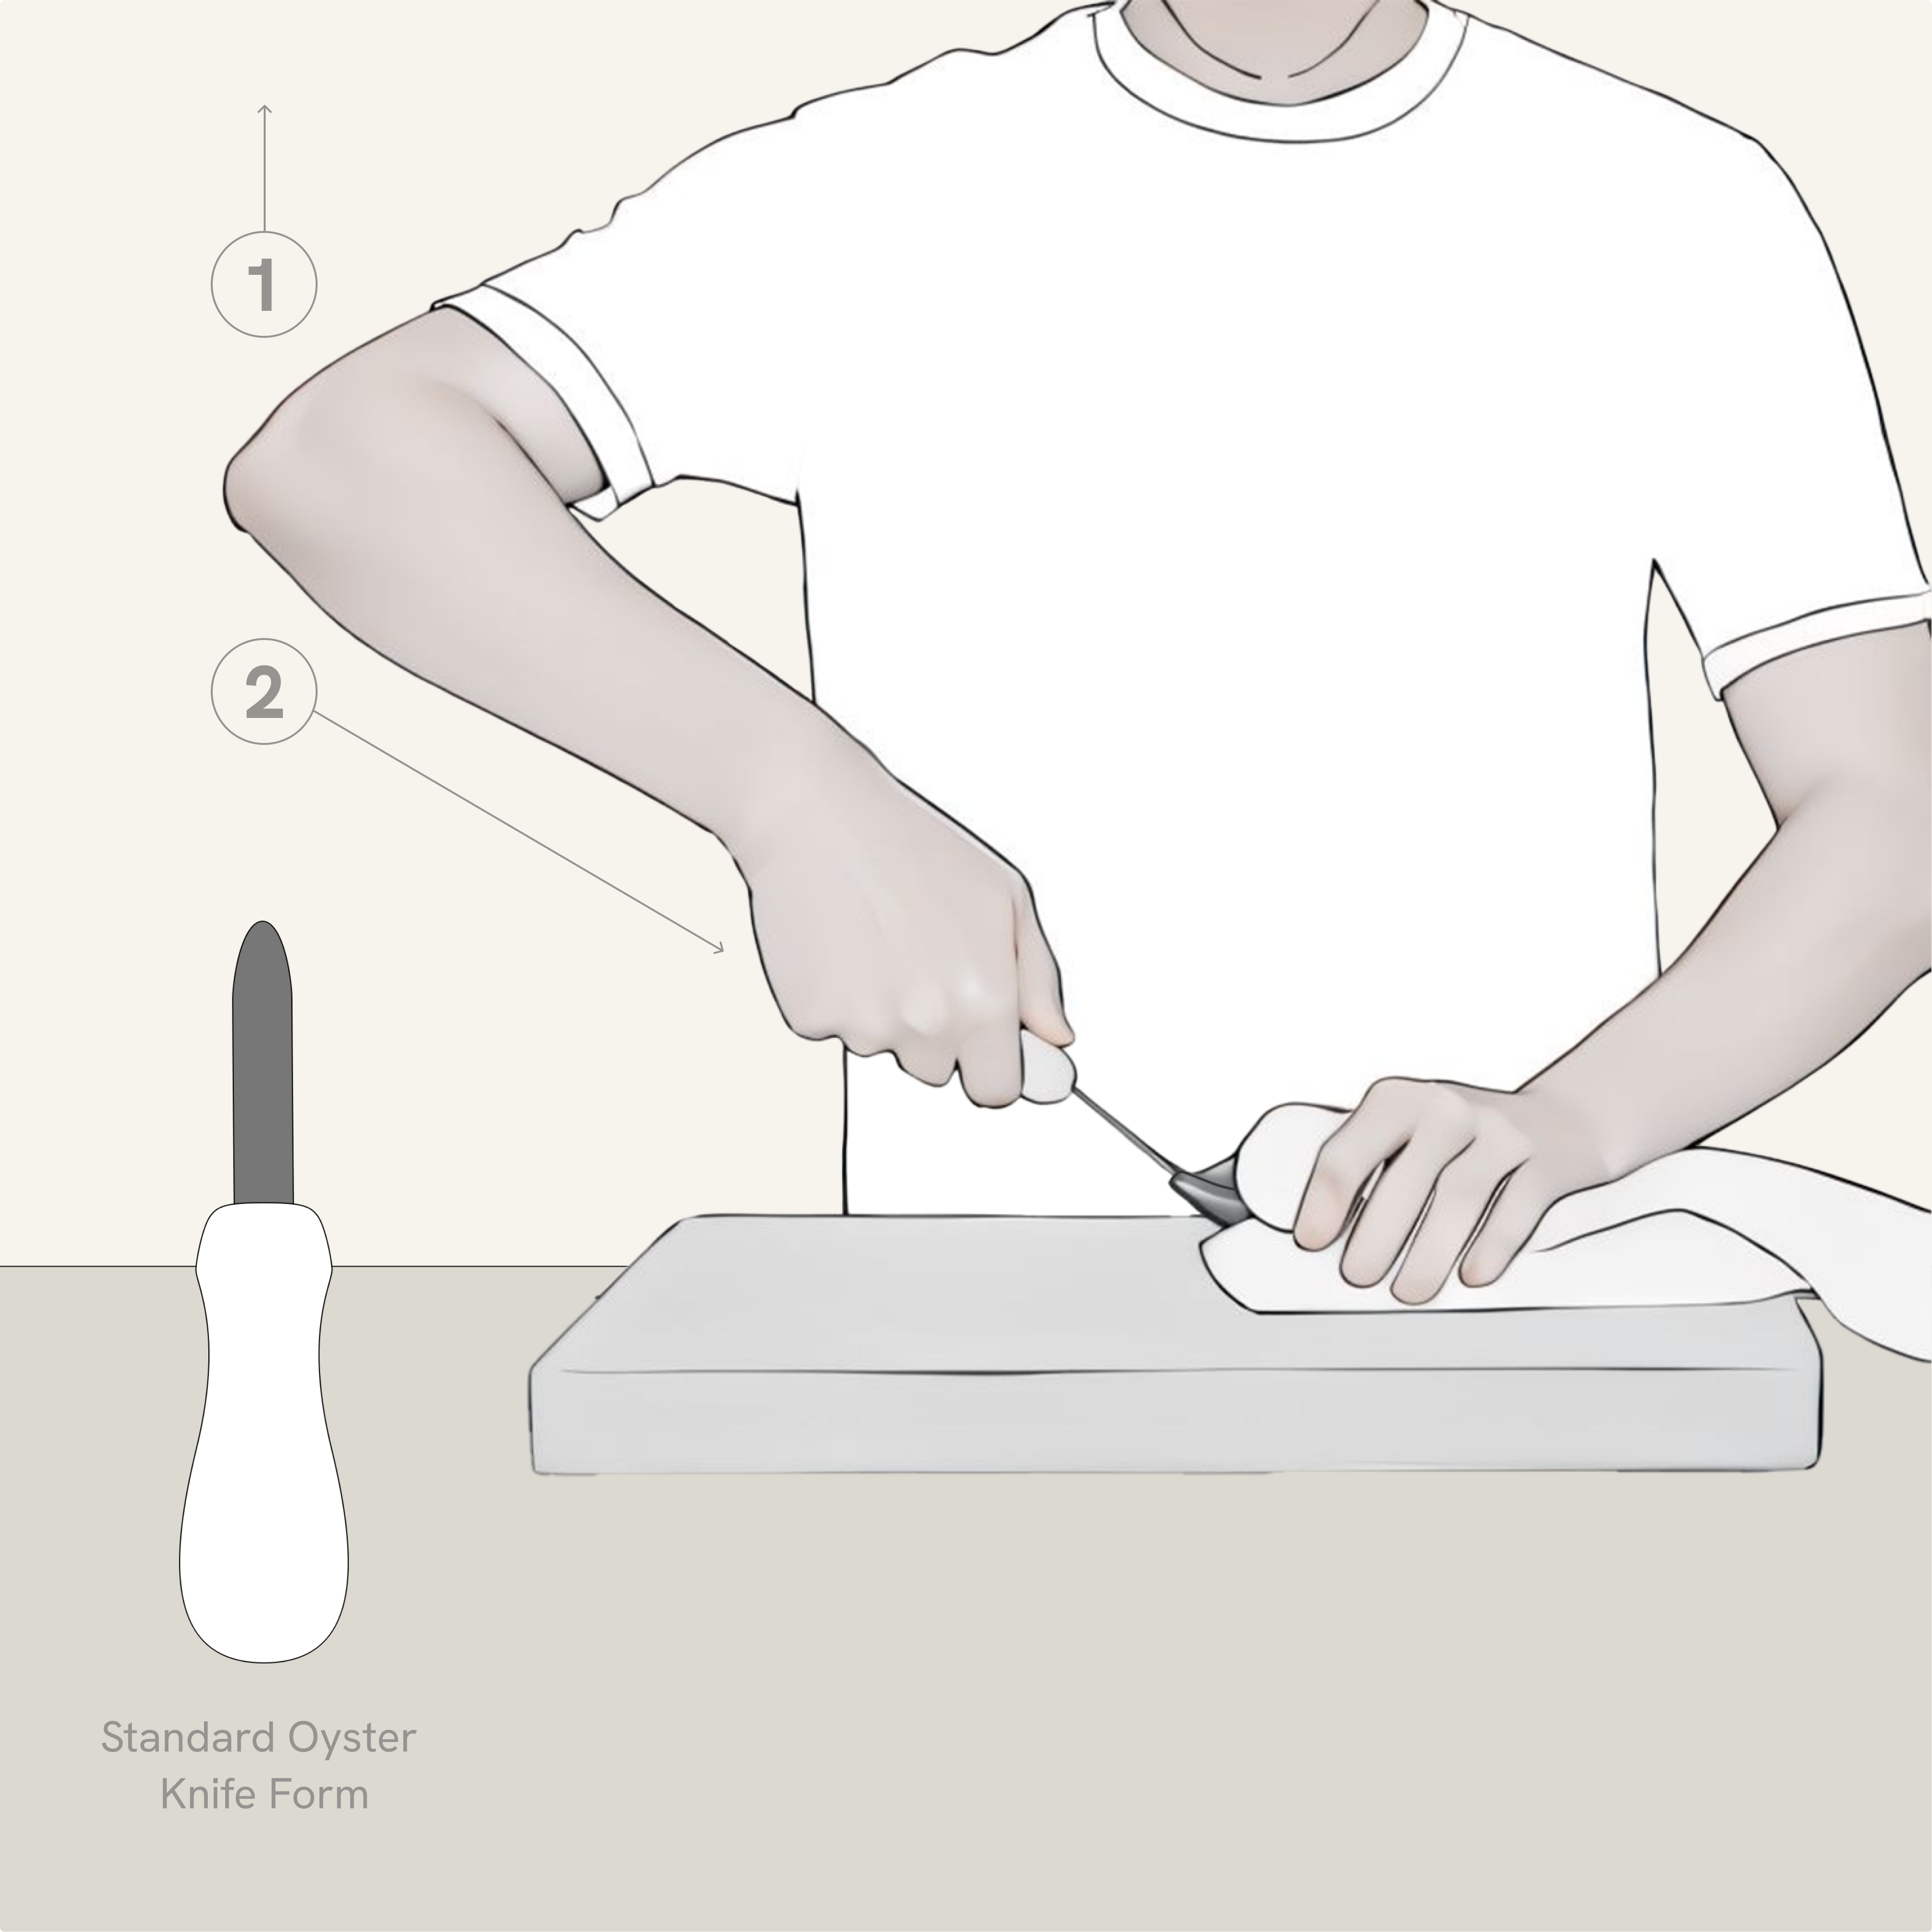
Every good tool starts with ergonomics. Our testing revealed two main pain points. First, to gain leverage, shuckers often hunch into a “chicken wing” stance, elbows high, shoulders and back strained. Over time, that adds up. Second, too much force is focused on the tip of the oyster. If the blade slips or the shell cracks, injuries happen fast.
Testing Oyster Knife Blades
We tested dozens of oyster knives with different tip shapes, and here’s what we found: no single blade works for every oyster. Some shapes are faster but riskier, others safer but slower. We grouped them into two types: pointed blades great for speed, risky at the hinge and rounded blades safer for side entry, but less effective at tough angles.
Concept Development
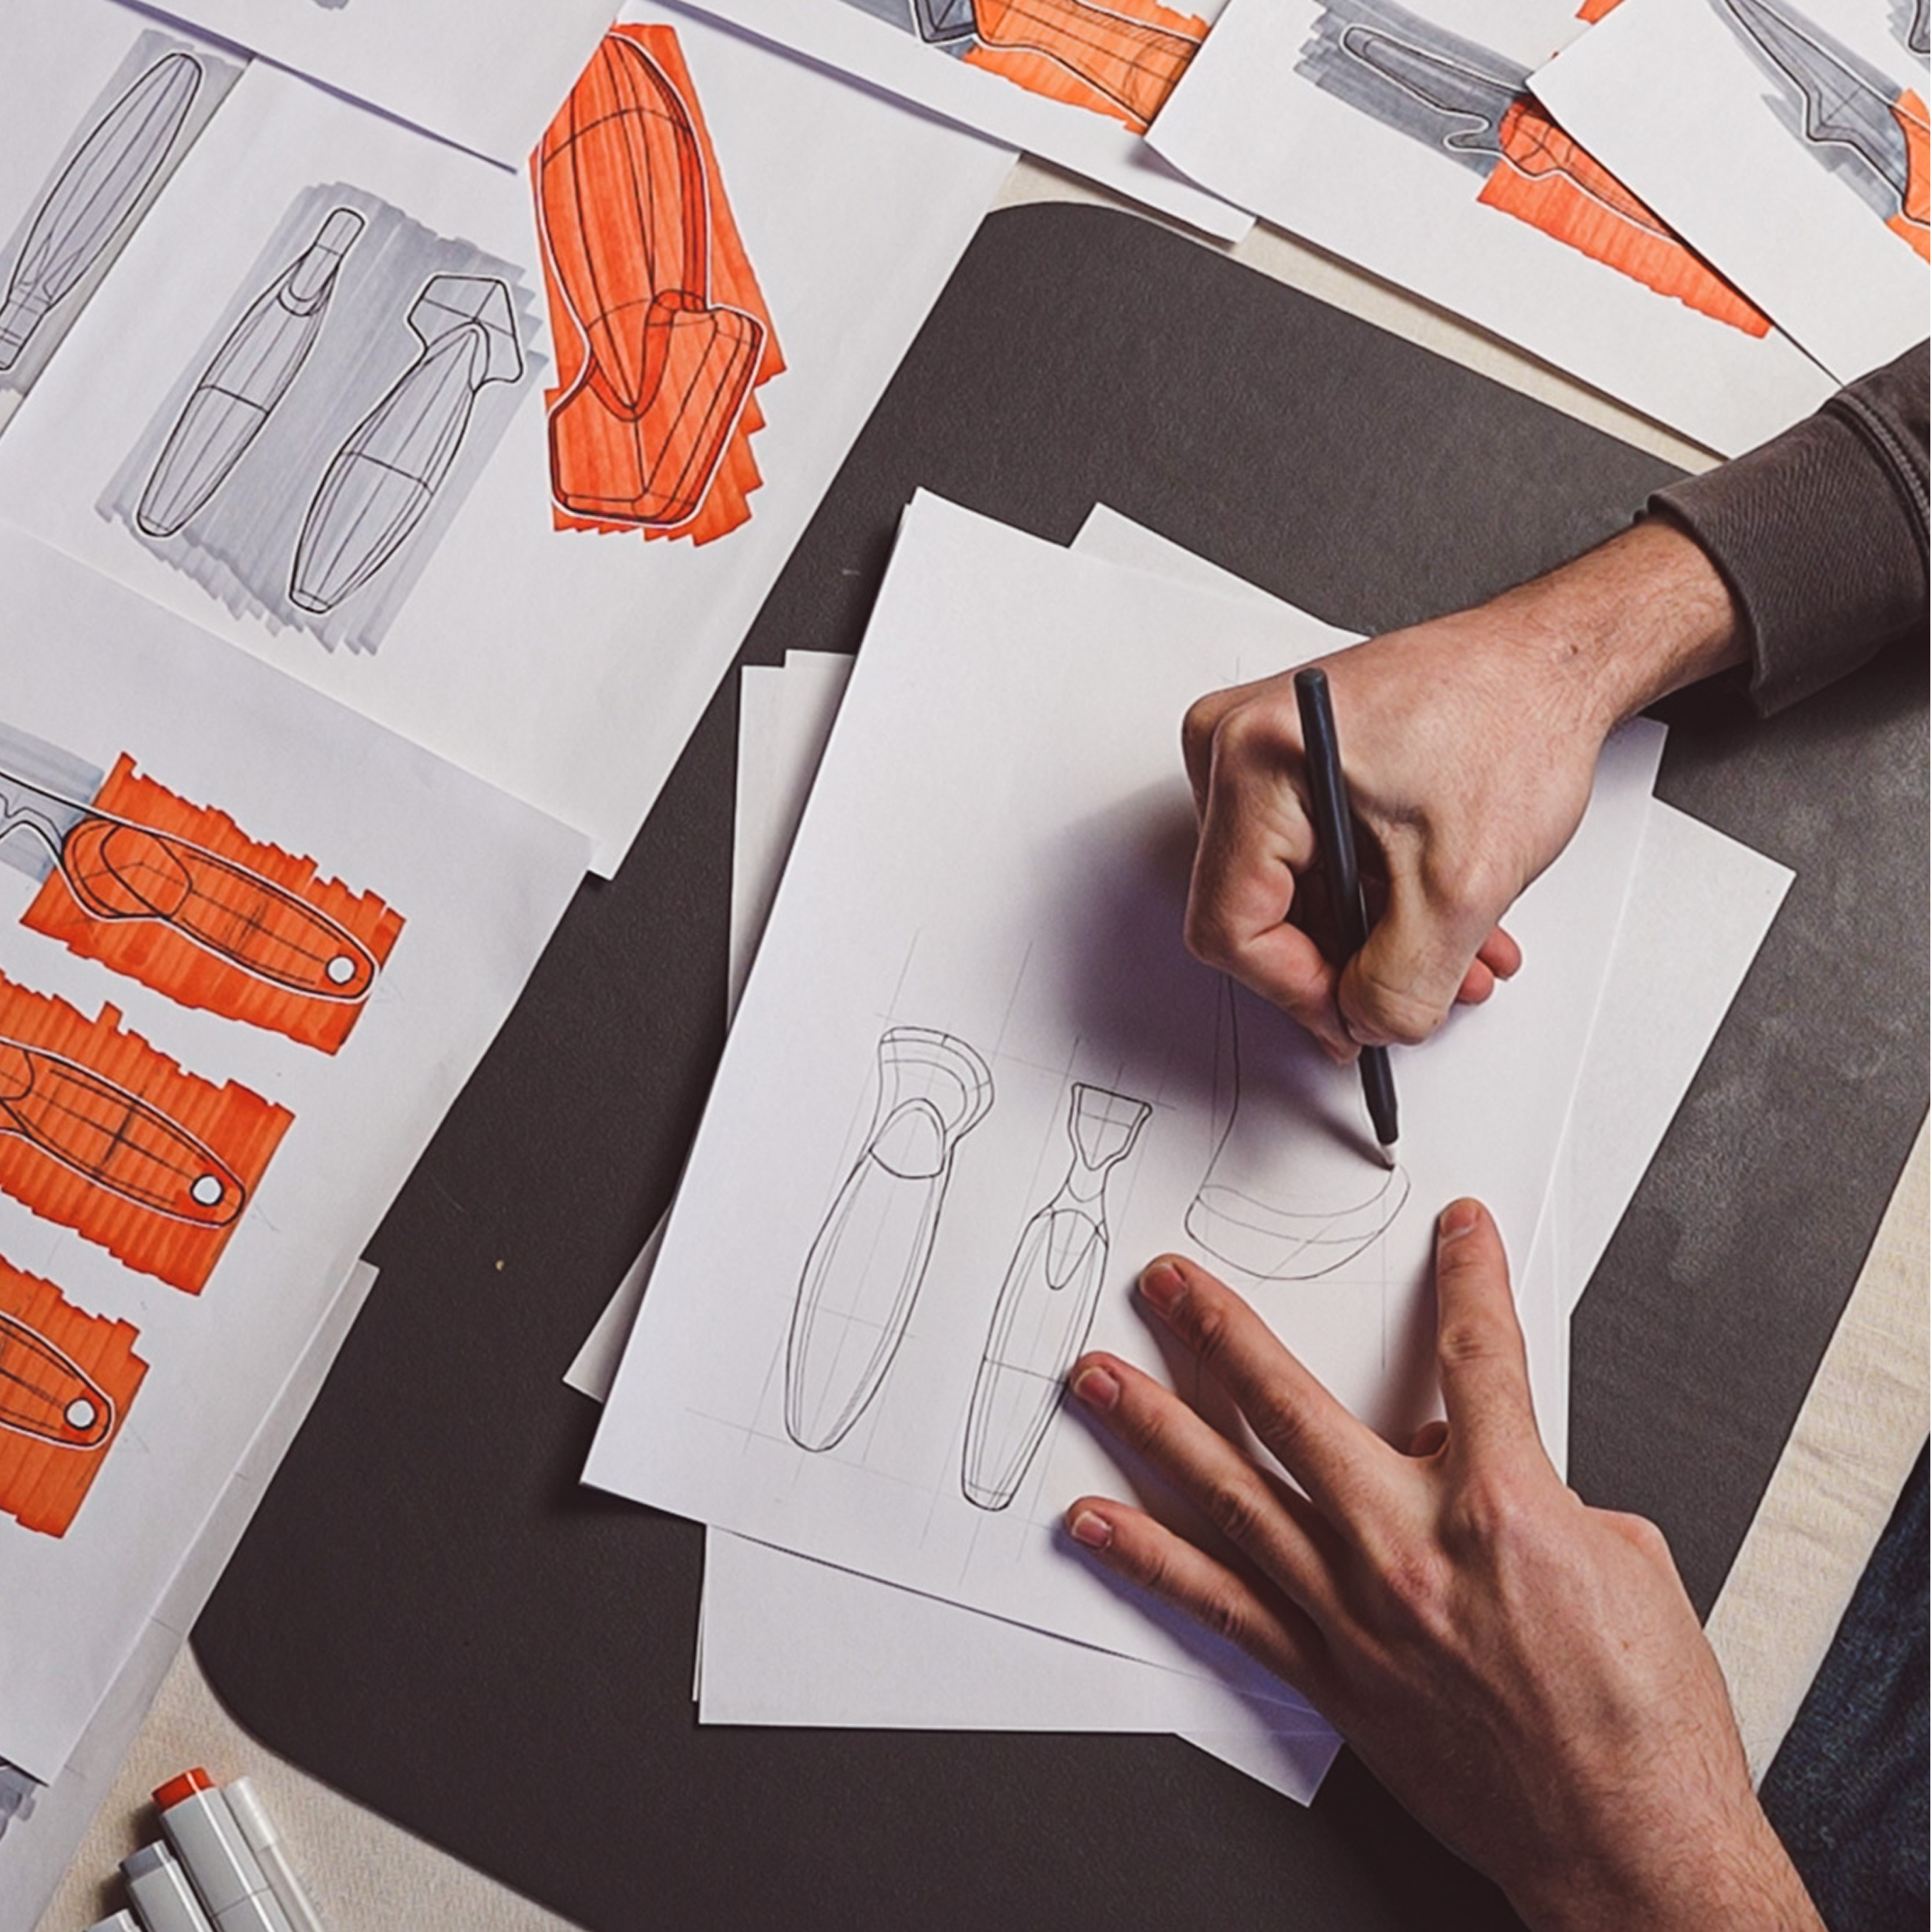
Sketching is where ideas start to take shape. With quick drawings, insights turn into new forms, and over time, those sketches evolve into refined product concepts. In CAD, we bring these ideas into 3D testing curves, tweaking surfaces, and shaping details until we’re ready for prototyping.
3D Printing
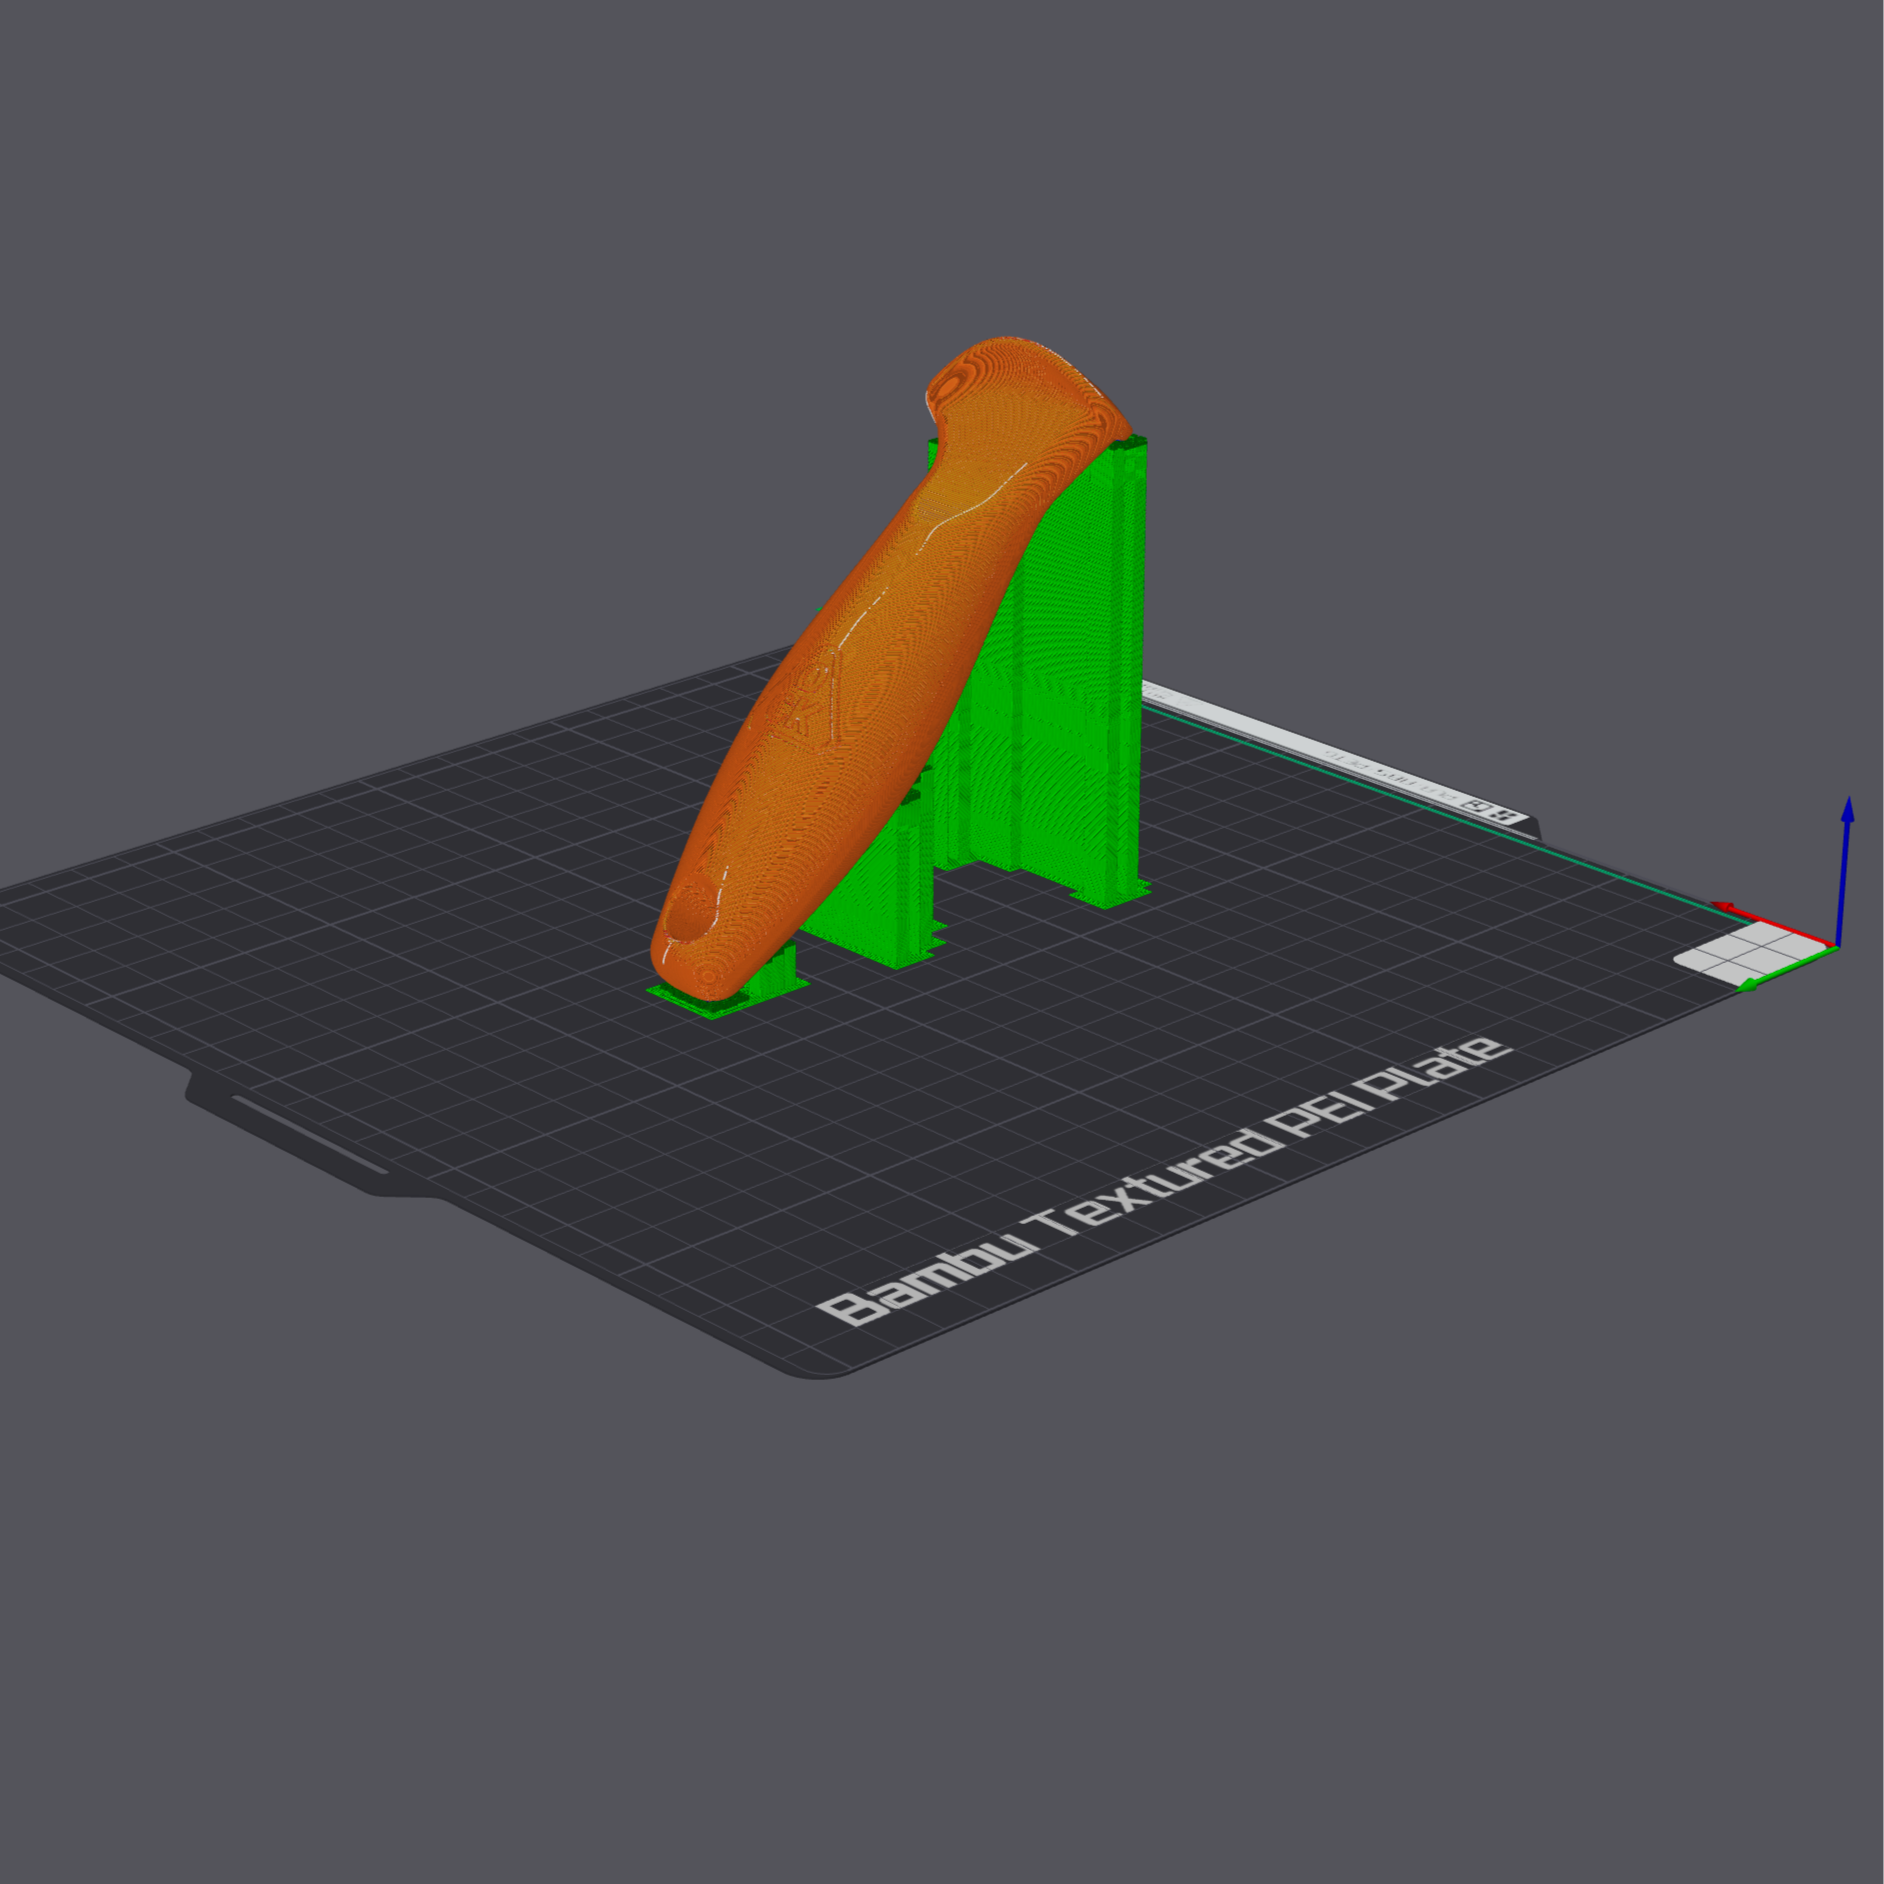
3D printing transforms sketches into physical prototypes. By layering filament, we build each knife from the ground up. This lets us test ideas quickly, adjust based on feedback, and repeat the cycle. It’s how we moved from rough drafts to a knife that works in the real world.
Our Process
