Talk about your brand
Pair text with an image to focus on your chosen product, collection, or blog post. Add details on availability, style, or even provide a review.
Blog Test Post
The Oyster Knife Hasn't Changed. Here's Why We Redesign It.
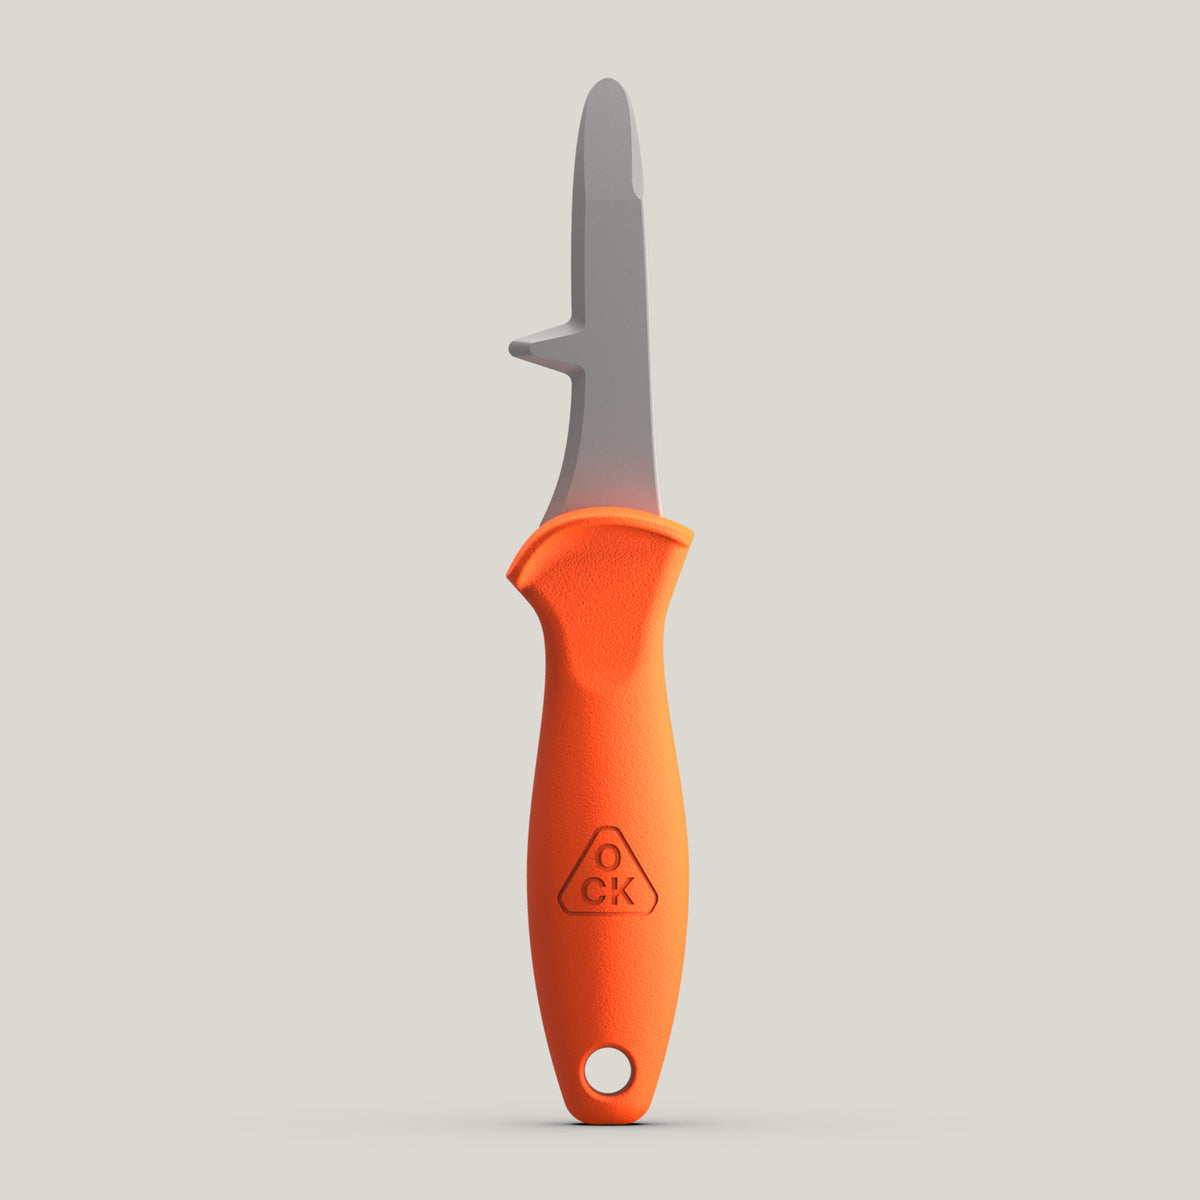
How Wellfleet Became HomeI grew up in New York City, where you'd see oysters occasionally. But every summer my family would go to Wellfleet, Cape Cod to visit my mom's side of the family, and oysters were everywhere, on every menu, scattered in the bay, roadside stands on the way into town. It's what made Wellfleet special. It gave the town personality and a sense of community. I was hooked. At 12, I got my first job working on a shellfish grant, harvesting commercial oysters and clams. There's something special about working the tidal flats, tough work, but rewarding. You spend a lot of time where the sea meets the land and start to understand this unique and vibrant ecosystem. At 16, I started working at the Beach Comber, a beach bar and restaurant with a raw bar overlooking Cahoon Hollow, right on top of the dune. This is where I got introduced to shucking. Over the years I worked my way up from dishwasher to line cook and eventually out behind the raw bar. The raw bar is a special place within a restaurant, front-of-house and back-of-house at the same time. You're taking orders, chatting with customers, prepping and serving food all at once. It's a dance, there's a rhythm to it, and in many ways you're putting on a show. But that show can go terribly wrong if there's a mishap. If you've shucked before, you know the worst part: the nicks and cuts. Everyone has a story. My mishap happened on my 3rd or 4th shift behind the raw bar. Saturday dinner rush, the outdoor bar was packed, deep line spilling into the crowd, ticket machine non-stop. I wanted to keep pace. Things were moving fast and mistakes happen. I remember glancing up at a ticket while shucking, and the next thing I knew I had an oyster knife in the palm of my other hand. Blood was gushing, you should have seen the look on the guy's face at the front of the line. Horrified. Blood on the rags, the plate, the oysters. I ran out, bandaged my hand, layered several gloves over it. Everything got cleaned up, the next few customers looked at me funny, and we were in the weeds the rest of the night. One slip with an oyster knife can cause real damage and ruin your night, whether you're working the raw bar or shucking at home. That stuck with me. Still working summers at the Comber, I attended SCAD and studied product design — learning how to take an idea and turn it into a tangible product. After college I went to work for Snap-on Tools in Wisconsin, in their innovation department focused on product research and design. I got to see the full cycle, from initial idea through R&D, manufacturing, and to market. I thought: if I can do this for mechanics, I can do it for raw bar shuckers and coastal home cooks. And honestly, I really missed the Cape. The oyster knife was a way to bring together the communities I love — shellfish farmers, restaurants, and design. So I moved back to Wellfleet, and Outer Cape Kitchen was born. How to Shuck an Oyster:1. Insert blade into hinge or side of oyster2. Pop and separate top and bottom shell3. Cut top abductor muscle4. Cut bottom abductor muscle5. Ready to serveLink: How to Shuck Oyster Anatomy 101:1. Hinge2. Side3. Abductor muscle4. Top shell5. Bottom shellLink: Oyster Lifecycle Every Oyster Knife on the Market Is Basically the Same KnifeBefore we started designing, we did our homework on what was already on the market. If we were going to build a better oyster knife, we needed to understand what shuckers were already working with and where things fell short. The oyster knife market basically breaks down into four tiers.At the bottom, you've got your value players, knives priced between $2 and $10. These are the workhorses you'll find at restaurant supply shops and seafood wholesalers. Boston, Providence, New Haven, Galveston — standardized blade forms that get the job done. Plastic handles, minimal ergonomic thought, built for volume, not craft. Restaurants buy these in bulk because they're cheap and replaceable. They're not bad tools; they're just not trying to be anything more than functional. The next tier up, entry-level professional in the $18–$30 range, is where brands like Dexter, R. Murphy, and Victorian Swiss live. These are the knives you'll actually see behind most raw bars. More reliable, better construction, still leaning on the same standardized blade forms. They're workhorses with a little more pedigree. Then you've got branded and innovative knives in the $30–$50 range — Messermeister, Town Cutler, Swordfish. This is where branding and identity start to enter the picture. Better handles, more thoughtful design, targeting the enthusiast and the professional who cares about what's in their hand. Good knives. Still, when you look at the blade geometry, you're not seeing a whole lot of rethinking of how the tool actually works. At the top, $120 and up, you've got boutique and collector knives — White Stone, Cape Cod Cutlery, Williams. These are beautiful objects. Exotic handle materials, handcrafted, more gift than tool in many cases. If you're buying one of these, you're buying a piece of craft. Here's the takeaway from all of it: the market has a ladder, but almost every rung is selling a variation of the same basic knife. The blade form hasn't changed much. Nobody had really gone back to first principles and asked — is this tool actually designed around how shucking works, or did we just inherit a shape and keep making it? That's the question we wanted to answer. What Raw Bar Shuckers Actually Told UsWe watched a lot of shucking. We traveled the coast, sat down at raw bars, and asked questions while throwing back oysters. We'd ask: "How did you learn to shuck? What do you like about your knife? What do you dislike?" We learned a ton. We broke down shucking into two categories: entry point and shucking style. The two primary entry points are the hinge of the oyster (most common) and the side of the oyster where the two shells meet (less common). Two primary shucking styles emerged as well: shucking on the counter, or shucking with the oyster in your palm. We break down the pros and cons of each below. Hinge vs. Side: The Two Ways to Open an OysterHinge shucking is the most common way to shuck an oyster. Virtually every oyster can be shucked from the hinge — farmed, wild, East Coast, West Coast, and European varieties alike. It's the method used at shucking competitions, behind the raw bar, and in the home kitchen. Depending on the oyster, the sweet spot for finding the right force and leverage may vary, but hinge shucking is trusted and dependable across the board. Oyster knives designed for hinge shucking tend to have a pointed tip that can be slightly rounded or come to a sharp point. Side shucking is less common. It's rarely seen in the home kitchen, occasionally seen behind the raw bar, and somewhat common in shucking competitions. Many shuckers say side shucking is faster than hinge shucking. The reasoning is that by entering the side of the oyster, you're already close to the abductor muscle — you can enter and cut the top abductor muscle in one motion, rather than working your way through the shell as you would with hinge shucking. Side shucking is most commonly used with European flat oysters. The flat shells allow for a smooth entry where, with a little force, the blade can slide right through. Conversely, it's nearly impossible to side shuck oysters with rough, wavy edges and no clean entry point. Side shucking also requires a real knowledge of the oyster — it can be hard to locate the correct entry point on the side, and easy to mistake shell growth rings for the seam where the shells meet. This leads to chipping the shell and extra cleanup work. Knowing the oyster well allows the shucker to apply just the right amount of pressure to separate the top and bottom shell cleanly. A good way to think about it: hinge shucking is the classic, standard method, reliable for beginners and pros alike, while side shucking is less common but beloved by expert shuckers who know the oyster they're working with like the back of their hand. Counter vs. Palm: How You Hold the Oyster Changes EverythingWhen it comes to shucking style, we found two main approaches. Unlike the entry point comparison, both are common. Palm shucking is when one hand holds the knife and the other holds the oyster — the shucking is done in the air. This works great for small or mobile raw bars. The one drawback, however, is that the hand holding the oyster must resist the force being applied by the knife, which can cause strain over time. Counter shucking requires more space but gives the shucker a stable surface to work on. Instead of tensely gripping the oyster against the pressure of the knife, the hand simply holds it steady without much strain. Three Problems Every Shucker Has — Whether They Know It or NotAfter watching, questioning, and listening, we came away with three guiding takeaways to define our direction designing the oyster knife. The Slip That Ruins Your NightEvery shucker we talked to had a story about a bad cut — whether it meant super-gluing a finger shut behind the raw bar or getting stitches at the ER after a family cookout. When shuckers apply too much force, that's when trouble starts, and one of three things tends to happen:1. Due to the length of the blade, the shucker can stab into and burst the oyster's belly when the knife slips and slides too far in.2. The same slip occurs, but the hand holding the oyster runs into the jagged, sharp shell, leaving nicks and cuts on the top of the hand and knuckles.3. Less common than the nicks but more painful: the tip of the blade slips out of the hinge and gets jabbed into the hand holding the oyster. Concentrating so much force on the very tip of the blade invites slippage — and slips lead to cuts. 1,000 Oysters a Day Takes a TollWhen talking to more seasoned shuckers, wrist strain and hand cramping came up frequently. Raw bar shuckers can go through 1,000 oysters a day, even more on peak summer weekends. The shucks add up fast and it takes a real beating on the body. Current shucking handles give the shucker a power grip — all four fingers wrapped around the handle, wrist perpendicular. It allows for a strong grip, but it's a tense one. I've seen old-timers develop a "lobster claw" where the hand is cramped and stiff but still locked in the same power-grip form. The wrist takes a beating, too. Popping the hinge with a standard oyster knife activates the wrist in a torquing motion, clockwise and counter-clockwise. A good buddy of mine ended up needing wrist surgery, it got so bad. And then there are the shoulders. To gain leverage, shuckers lift their elbow and rock up and down to wiggle the knife into the hinge. Do that a thousand times and your back feels it, on top of being on your feet for a full shift. It's Not a Knife. It's a Pry Tool. The current standard oyster knife design tends to encourage a stabbing motion, whether entering the hinge or the side of the oyster. And given that it's called an oyster knife, shuckers often assume it's meant to have a cutting function. Before we started designing, we defined our oyster knife as a tool meant to pry open the top and bottom shells and scrape the abductor muscle from the shell so it's fully severed. Thinking about it as a prying tool allowed us to rethink how and where pressure is applied. When shucking an oyster, the goal is to leave everything intact on the shell. Rather than slicing through the abductor muscle, shuckers should scrape along the top shell — this keeps the oyster whole and pristine. Work Smart, Then FastShuckers want a technique that is safe, efficient, and controlled, with speed as the result, not the goal. By designing a safer oyster knife that encourages an efficient, controlled, compact shuck, we allow the user to move faster while keeping safety built into the motion. A shucker, whether behind the raw bar or at home, is only as fast as they are safe. A slip, a nick, or a cut can ruin the party or back up the tickets. Work smart, then fast. From Problems to Design: How the Research Shaped the KnifeThree clear problems came out of our research. Every design decision we made traces back to one of them. Ergonomics: Taking the Hand Out of the Danger ZoneFrom the jump, we knew redesigning the oyster knife meant rethinking the ergonomics of shucking from the ground up, not just the handle shape, but where force comes from and where the hand sits in relation to the blade. The cuts and the strain are really the same problem showing up in two different ways. Both trace back to the same root cause: too much force concentrated in the wrong place. When the tip of the blade is doing all the work, the shucker has to bear down hard, and a hard bear-down means any slip sends the blade somewhere it shouldn't go. That's how you get a knife in your palm. That's also how you build up the kind of repetitive strain that leaves raw bar shuckers with cramped hands, torqued wrists, and sore shoulders after a long shift. The goal was to redistribute that force, decrease the pressure needed to pop the hinge, move the hand out of the danger zone, and find a grip that's strong without being tense. A grip you can hold for a thousand oysters without your hand locking up. Form: Why Nothing Needs to Be SharpHere's something that became obvious early on: nothing about an oyster knife needs to be sharp. No razor edge, no aggressive point. The oyster isn't being cut, it's being pried open and scraped clean. What matters is durability, toughness of material, and the right curvature to generate leverage without brute force. We stopped thinking about blade retention and started thinking about blade geometry — the shape that lets the tool do the work so the shucker doesn't have to. Technique: Compact, Controlled, RepeatableAll of this had to add up to a technique, one that's compact, controlled, and repeatable at speed. The shuck we were designing toward is low-force, low-risk, and consistent whether you're doing your first dozen at a backyard cookout or your five-hundredth behind a packed raw bar on a Saturday night. Safe and efficient aren't in tension. When the technique is right, speed is just what happens. The Design Question That Guided EverythingHow might we design an oyster knife that reduces injury risk and repetitive strain, so that shuckers of all skill levels can shuck faster, cleaner, and longer — without the tool getting in the way? Built for Oyster. Designed for Everyone. Oysters have a way of bringing people together. Around raw bars, at cookouts, on long summer weekends, crack open a few and suddenly everyone's leaning in. That's always been true on the Cape, and it's a big part of why this project matters to us. The oyster knife sitting in most people's drawers, or bolted to the side of a raw bar, was never really designed with that experience in mind. It was inherited, standardized, and left alone. We think it can do better. A tool that's safer to use, kinder on the body over a long shift, and built around how shucking actually works, not just what the knife has always looked like. That's what we set out to build. One that works for the home cook just getting started and holds up for the pro going through a thousand a day. To learn more about how we designed it, continue reading: Behind the OCK Oyster Knife Design →
Learn moreWhat to Know About Shucking Oysters
What to know about shucking oystersShucking is a skill that takes time to master, but fear not, here is a quick guide to everything you need to know to shuck the perfect oyster. We’ll cover types of oysters and what impacts their shape, size, and taste to body parts key to shucking and different shucking that suit your needs. Types of OystersAcross the world, there are dozens of oyster varieties, but almost every oyster you’ll find in the U.S. comes from five main species. Each one has a distinct location, flavor profile, and shell shape, which is why an East Coast oyster tastes so different from a West Coast one. Here’s a quick breakdown of the five oyster types you’ll see most often on raw bars, menus, and seafood markets. Eastern Oyster (Crassostrea virginica): Found all along the East Coast from the Gulf to Canada, Eastern oysters have a clean, briny, mineral flavor and elongated, teardrop-shaped shells. They’re the most common U.S. oyster, with flavor that shifts by region. Pacific Oyster (Crassostrea gigas): Grown on the West Coast and across the Pacific Rim, Pacific oysters offer sweet, melon-like notes with medium brine and deep, fluted, ruffled shells. They’re the most widely farmed oyster species in the world. Kumamoto Oyster (Crassostrea sikamea): Raised mostly on the West Coast, Kumamotos are small, sweet, and buttery with deep, sculpted cups. Their petite, photogenic shells and approachable flavor make them a raw-bar favorite. European Flat / Belon (Ostrea edulis): Native to Europe and grown in small amounts in Maine, European flats have a bold, metallic, ocean-heavy flavor and round, coin-flat shells. They’re rare, intense, and beloved by experienced oyster eaters. Olympia Oyster (Ostrea lurida): A tiny native of the West Coast, Olympias delivers a sharp, coppery, earthy flavor in small, shallow, round shells. Limited in supply, they’re a specialty oyster prized for their distinctive taste. Key Biological Parts to Shucking an OysterUnderstanding a few key parts of an oyster’s anatomy makes shucking easier, safer, and a lot more intuitive. From the hinge that holds the shells together to the liquor that carries the oyster’s flavor, each feature plays a role in how the oyster is opened and served. Here's a quick look at the parts that matter most. Top & Bottom Shell: An oyster’s top shell is flat while the bottom shell forms a deep cup that holds the meat and liquor. Knowing which side is which helps you orient the oyster correctly and avoid spilling the brine as you shuck. Hinge: The hinge is the thick, durable point where the two shells meet, acting like the oyster’s natural lock. It’s the safest and most controlled entry point for a shucking knife because the shell is strongest here. Shell Lips: These are the thin, brittle edges running around the top and bottom shells. They chip easily under pressure, which is why controlled force and the right blade matters especially with side shucking. Mantle: The mantle is the soft, skirt-like tissue that lines the inside of the shell and creates new shell growth. When shucking, keeping the mantle intact helps the oyster look clean and well-presented on the half-shell. Gills: The gills are feathery structures that filter plankton and seawater, allowing the oyster to breathe and feed. They also help clarify the oyster’s liquor, contributing to the clean brine flavor. Heart: Oysters have a small, beating heart located near the adductor muscle, and it can sometimes pulse right after you open a fresh oyster. It plays no role in shucking but adds a fascinating detail about their biology. Liquor: The liquor is the oyster’s naturally trapped seawater, held in the cup of the bottom shell. It’s packed with brine and flavor and should always be preserved when shucking for the best raw oyster experience. Why Redesign the oyster knife?For anyone who has spent time on oyster grants, behind raw bars, or shucking for friends at home, one truth becomes clear fast: the traditional oyster knife hasn’t changed much in decades. Through years of personal experience, and countless conversations with coastal folks, raw-bar shuckers, fishermen, and market teams, the same pain points surfaced again and again: cuts, strain, and long-term hand fatigue. Every shucker has their story about the one time they cut themselves really bad. The most common injury are cuts and knicks across the top knuckles, caused when the blade pushes too deep into the shell and the hand runs into the sharp shell. The second, often more serious, is when the knife slips out of the hinge and lands in the opposite hand holding the oyster, cause a nice gash. Shucking oyster is about finesse, not force. Whether you’re hosting guests on a Saturday night or working a packed raw-bar shift, no one wants a trip to the ER or a bandaged hand during service. Beyond cuts, there’s the strain. Many professional shuckers develop chronic wrist pain, numbness, or overuse injuries from thousands of repetitive motions. Some friends of mine have needed wrist surgery, and old-school shuckers often talk about locked-up hands after decades of working with tools that were never really designed with ergonomics in mind. This raised a simple question: Could the oyster knife be redesigned to make shucking safer, more comfortable, and more versatile, without changing the soul of how oysters are opened? Shucking Technique #1 | Hinge ShuckingHinge shucking is the safest, cleanest, and most controlled way to open an oyster. By entering through the hinge, the strongest part of the shell, you get a compact, predictable shuck with minimal risk of slipping or cutting your knuckles. It’s the preferred method for both at-home shuckers and raw-bar professionals because it keeps your hands protected and the oyster intact. Insert the Blade Into the Hinge: With the pointed tip of the blade, find the hinge at the back of the oyster and gently press into the natural opening. Grip and Stabilize: Place the fingers of your non-dominant hand over the back of the blade, squeezing the knife and oyster together until everything feels snug and locked in. Rotate to Pop the Shell: Keeping your fingers braced on the back of the blade, rotate your forearm to apply controlled pressure. Push downward into the hinge until you feel the pop that separates the top and bottom shells. Sever the Top Adductor Muscle: Slide the blade along the inside of the top shell until you reach the adductor muscle. Cut through it cleanly, then remove the top shell. Free the Oyster From the Bottom Shell: Locate the adductor muscle still attached to the bottom. Slide your knife under the oyster, scraping gently along the bottom shell, and cut through the bottom attachment. Ready to Serve: The oyster is now fully severed, clean, and ready for presentation. Shucking Technique #2 | Side ShuckingSide shucking is fast, efficient, and commonly used in competitions or high-volume environments. By entering through the side seam of the oyster, you can reach the top adductor muscle quickly. It requires more precision than hinge shucking and involves working through the shell’s edge, but once mastered, it’s an incredibly quick method. Find the Shell Seam With the Rounded Edge of the Blade: Use the rounded top part of the blade to locate the point where the top and bottom shells meet along the side. Wiggle Into the Shells: Gently wiggle the blade into the seam until it slides between the shells. Swipe Up to Cut the Top Adductor: Once the blade is tucked in place, angle upward and make a smooth swipe to slice through the top adductor muscle. This will release the top shell. Remove the Top Shell: Lift off the top shell to reveal the oyster in the bottom cup. Sever the Bottom Muscle: Just like hinge shucking, find the remaining adductor muscle attached to the bottom shell. Slide your blade underneath the oyster and cut through to free it completely. Ready to Serve: The oyster is now fully separated and ready for the plate.
Learn more
How to Shuck Any Oyster
How does oyster anatomy and species impact shucking? What are the best oyster knives for the species or variety you’re shucking? How do you hinge shuck an oyster or side shuck an oyster? We dive into everything you need to know to shuck like a pro.
Learn more
How are Oysters Grown?
There are tons of different ways to grow an oyster, from long-line to bottom culture to floating bags and racks. Where an oyster is grown, how it’s grown, and oyster spat genetics have a huge impact on how an oyster tastes and looks. We explore how oyster farming methods and ecosystems shape an oyster’s meroir.
Learn more
How Oysters Protect and Restore Coastal Ecosystems
Did you know an adult oyster can filter up to 50 gallons of water a day? Oyster cultivation is a form of restorative aquaculture, improving water quality and supporting wild populations. In our new blog post, we explore the boom, bust, and renaissance of the Cape Cod oyster and explore how restoration efforts and sustainable aquaculture helped re-establish a 29-million-dollar industry.
Learn more